1. To add a child record, choose Child Administration > Add Child.
2. When the Child Information page opens, enter information in the fields and use the drop-down lists to identify the child. Fields marked with a red asterisk (*) are required.
3. To assign the child to a location, expand the hierarchy list and select a location. You must select a location on the lowest level of your hierarchy. Click
![]() after making your selection.
after making your selection.
|
Expanded hierarchy with selected location assigned. |
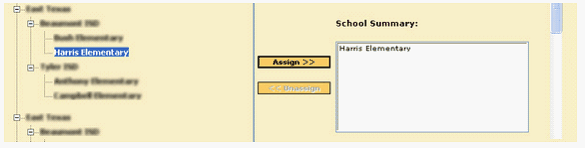
4. The location appears in the School Summary box. Locate the Available Class box and select a group in which to assign the child.
|
Expanded hierarchy with assigned location selected. |
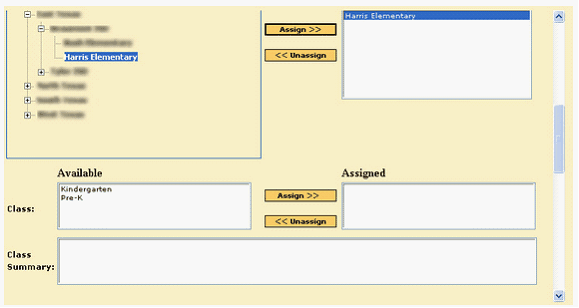
Click
![]() to add the child to the selected group. You can assign the child to more than one group.
to add the child to the selected group. You can assign the child to more than one group.
|
Available classes from assigned location—with one class assigned and summary displayed. |
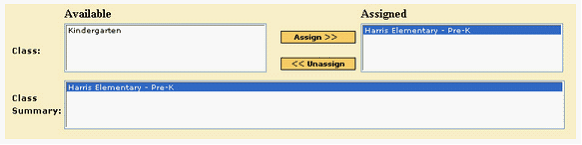
A summary appears in the Class Summary box for each group you select.
5. Complete the Family Information fields.
If user-defined fields have been added, you can enter additional information about the child and/or family. Note that information entered in the user-defined fields is not included in the reports. To include such information in the reports, add notes to the record.
6. Click
![]() to save the new child record.
to save the new child record.
See also: